Introduction
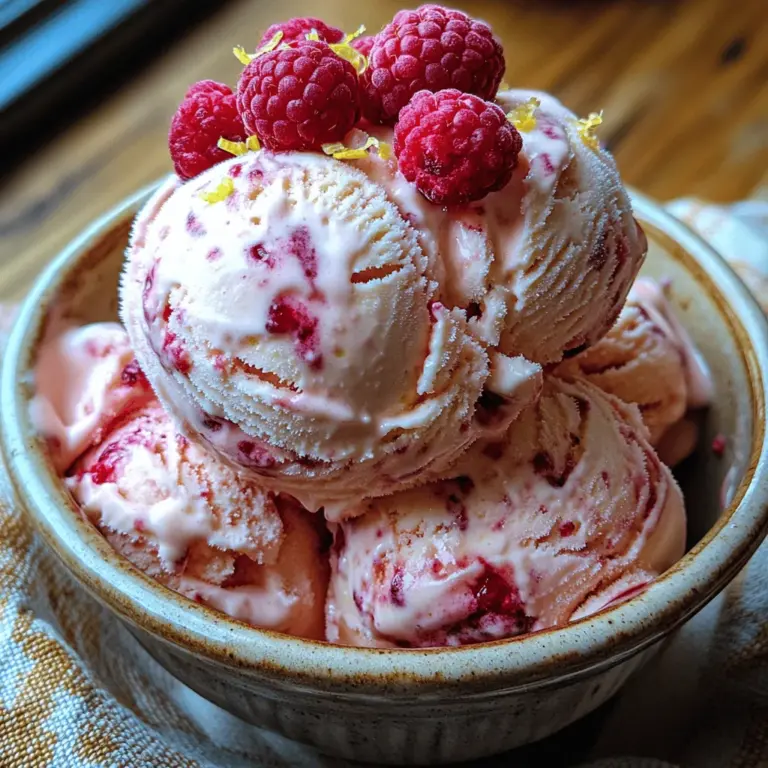
There’s something undeniably alluring about homemade ice cream, especially during the warm summer months when the sun invites us to indulge in cool, refreshing treats. The beauty of crafting your own ice cream lies not only in its rich, creamy texture but also in the ability to experiment with seasonal flavors. One such flavor combination that embodies the essence of summer is Lemon Raspberry Whirl Ice Cream. This delightful dessert marries the tart brightness of lemons with the sweet, juicy allure of ripe raspberries, creating a symphony of flavors that dance on your palate.
Lemon Raspberry Whirl Ice Cream is not just a treat for your taste buds; it’s a versatile dessert that can elevate any summer gathering, from backyard barbecues to birthday parties. Its vibrant colors and refreshing taste make it a perfect centerpiece for celebrations or just a simple indulgence on a hot day. Whether served in a cone, a bowl, or sandwiched between cookies, this ice cream offers a delightful way to cool down while enjoying the best that the season has to offer.
In this article, we will delve into the key ingredients that bring this luscious ice cream to life, followed by a detailed step-by-step guide to making it yourself. Get ready to impress your family and friends with a homemade ice cream that’s as delightful to make as it is to eat.
Understanding the Ingredients
Fresh vs. Frozen Raspberries
Raspberries serve as the fruity heart of our Lemon Raspberry Whirl Ice Cream, and the choice between fresh and frozen can significantly impact the final product. Fresh raspberries, available during peak summer months, offer a burst of vibrant flavor and a more robust texture. They are ideal for creating a chunky swirl in your ice cream, providing bursts of sweetness and tartness that are truly irresistible.
On the other hand, frozen raspberries can be a great alternative if fresh ones are out of season or if you want to save some prep time. They are typically frozen at peak ripeness, preserving much of their flavor. However, they tend to be softer and may break down more during cooking, resulting in a smoother sauce. Whether you choose fresh or frozen, be sure to select high-quality berries for the best flavor and color.
The Role of Granulated Sugar
Granulated sugar is more than just a sweetener in this recipe; it plays a critical role in balancing the tartness of the lemons and the flavor of the raspberries. The right amount of sugar enhances the overall taste while contributing to the creamy texture of the ice cream. When making the raspberry sauce, sugar helps draw out the natural juices from the berries, creating a luscious mixture that can be swirled into the ice cream base.
It’s important to adjust the sugar levels based on the ripeness of your fruit. If your raspberries are particularly sweet, you might want to reduce the sugar slightly, ensuring that the tartness of the lemons shines through.
Importance of Heavy Cream and Whole Milk
The base of any ice cream is crucial to its creaminess, and for our Lemon Raspberry Whirl Ice Cream, a combination of heavy cream and whole milk is essential. Heavy cream provides a rich, luxurious texture that is characteristic of gourmet ice creams. Its high-fat content ensures a smooth mouthfeel and helps prevent ice crystals from forming, resulting in a creamy, scoopable dessert.
Whole milk, on the other hand, adds a lightness to the mixture while still contributing to the overall creaminess. The combination of these two dairy products creates a balanced ice cream base that is both indulgent and refreshing, allowing the vibrant flavors of lemon and raspberry to shine without being overly rich.
The Significance of Lemon Zest and Juice
The star of the show in this ice cream recipe is undoubtedly the lemon. Fresh lemon zest and juice are integral to capturing that bright, tangy flavor that complements the sweetness of the raspberries. The zest contains essential oils that provide a fragrant aroma and intense lemon flavor, while the juice adds acidity that balances the sweetness of the other ingredients.
Using fresh lemons is crucial; bottled lemon juice lacks the vibrant flavor and zestiness of freshly squeezed juice. For the best results, use organic lemons, as they are less likely to be coated in wax, making them ideal for zesting.
The Function of Vanilla Extract and Salt
While lemon and raspberry are the primary flavors, a touch of vanilla extract enhances the overall profile of the ice cream, adding depth and warmth. Vanilla brings a subtle sweetness that balances the tartness of the lemon and the sweetness of the raspberries, creating a harmonious blend of flavors.
A pinch of salt is also essential in this recipe. Salt amplifies the sweetness of the fruit and helps to round out the flavors, making the ice cream more enjoyable. Don’t skip this step; it’s a small addition that makes a big difference in the final taste.
Step-by-Step Guide to Making Lemon Raspberry Whirl Ice Cream
Creating your Lemon Raspberry Whirl Ice Cream is a delightful process that allows you to enjoy the fruits of your labor. Below are detailed steps to guide you through making this refreshing treat, starting with the preparation of the raspberry sauce.
Preparing the Raspberry Sauce
1. Gather Your Ingredients: To make the raspberry sauce, you will need 2 cups of fresh or frozen raspberries, ½ cup granulated sugar, and the juice of 1 lemon.
2. Cook the Raspberries: In a medium saucepan, combine the raspberries and sugar over medium heat. As the mixture heats, gently mash the raspberries with a fork or a potato masher to release their juices. Stir occasionally to ensure even cooking.
3. Simmer and Thicken: Bring the mixture to a gentle simmer. Allow it to cook for about 5-7 minutes, or until the sauce thickens slightly. You are looking for a texture that can easily swirl into your ice cream base without being too runny. If you prefer a smoother sauce, you can strain the mixture through a fine-mesh sieve to remove the seeds.
4. Add Lemon Juice: Once the sauce has thickened, remove it from the heat and stir in the lemon juice. This will enhance the flavor and brighten the sauce. Allow it to cool to room temperature before using it in the ice cream.
5. Suggestions for Variations: For an added dimension of flavor, consider infusing your raspberry sauce with herbs like mint or basil. Simply add a few sprigs to the pan while cooking, then remove before cooling. You can also try adding a hint of spice, such as a pinch of cinnamon or cardamom, to create a unique twist.
Making the Ice Cream Base
1. Combine the Ingredients: In a large mixing bowl, whisk together 1 cup of heavy cream, 1 cup of whole milk, ¾ cup of granulated sugar, the zest of 2 lemons, and a pinch of salt. Whisk until the sugar is fully dissolved and the mixture is smooth.
2. Incorporate Vanilla: Stir in 1 teaspoon of pure vanilla extract, which will enhance the flavors of the ice cream base.
3. Chill the Mixture: To achieve a creamy texture, it’s crucial to chill the ice cream mixture before churning. Cover the bowl with plastic wrap and refrigerate for at least 2 hours or overnight. Chilling allows the flavors to meld and ensures that the ice cream churns smoothly.
4. Churning the Ice Cream: Once the mixture is well-chilled, pour it into your ice cream maker. Follow the manufacturer’s instructions to churn the ice cream until it reaches a soft-serve consistency. This process typically takes about 20-25 minutes.
5. Swirling in the Raspberry Sauce: When the ice cream is churned, transfer half of it to an airtight container. Drizzle half of the prepared raspberry sauce over the ice cream, then add the remaining ice cream on top. Swirl the raspberry sauce gently with a spatula to create beautiful ribbons throughout the ice cream.
6. Final Freeze: To achieve a firmer texture, place the container in the freezer for at least 4 hours or until fully set. This step is essential for allowing the flavors to develop and for the ice cream to reach the perfect scoopable consistency.
By following these steps, you are well on your way to creating a delicious Lemon Raspberry Whirl Ice Cream that will be the highlight of any summer gathering. The combination of tart lemons and sweet raspberries, paired with a creamy base, is sure to delight everyone who tries it. Stay tuned for the second part of this article, where we will explore additional tips and tricks to perfect your homemade ice cream experience and answer some common questions about this delightful dessert.
Churning the Ice Cream
Churning is a crucial step in making creamy, dreamy ice cream, and the method you choose can significantly impact the final result. There are several types of ice cream makers available on the market, each with its advantages.
1. Traditional Ice Cream Makers: These usually require pre-freezing a bowl for 24 hours before use. Once the mixture is ready, you pour it into the bowl and churn it manually or with an electric motor. The advantage is that they are typically more affordable and can yield excellent results.
2. Compressor Ice Cream Makers: These are more expensive but come with a built-in freezer, allowing you to churn ice cream without pre-freezing the bowl. This feature is especially convenient if you want to make multiple batches in one sitting.
3. Hand-Crank Ice Cream Makers: These nostalgic machines require manual labor but can be a fun family activity. They involve churning ice cream with a hand crank, and while they may take longer, they often yield a delightful result.
Regardless of the type of ice cream maker you choose, the consistency during the churning process is essential. You want to churn until the mixture reaches a soft-serve texture. This usually takes about 20 to 30 minutes in most machines. As it churns, keep an eye on the mixture, ensuring it doesn’t become too icy or grainy. The ideal consistency should be smooth and creamy, resembling thick yogurt.
Marbling the Raspberry Sauce
Once your ice cream base has reached the desired consistency, it’s time to incorporate the raspberry sauce. Achieving a beautiful marbled effect requires a bit of finesse. Here are some tips to help you create an eye-catching swirl while maintaining a balanced flavor:
1. Layering Technique: Start by layering half of the churned lemon ice cream into a freezer-safe container. Drizzle a layer of raspberry sauce over the top, then add the remaining lemon ice cream and finish with another drizzle of sauce. Use a knife or a skewer to gently swirl the raspberry sauce through the ice cream, being careful not to overmix. You want distinct ribbons of raspberry to create a stunning visual effect.
2. Flavor Balance: The key to a successful marbling is ensuring that the raspberry sauce complements the lemon ice cream without overpowering it. You can adjust the sweetness or tartness of the sauce to achieve this balance. Taste the sauce before adding it to the ice cream and adjust as necessary.
3. Creative Variations: While lemon and raspberry make a delightful pairing, feel free to experiment with other fruits or sauces. Consider using strawberry puree for a berry medley, passion fruit for a tropical twist, or even chocolate sauce for a rich variation. The possibilities are endless, so let your creativity guide you!
The Freezing Process
After marbling, the next step is to freeze the ice cream to solidify it. The freezing time is crucial for developing both texture and flavor. Ideally, you should allow the marbled ice cream to freeze for at least 4 hours, or overnight for best results. This extended freezing time ensures that the flavors meld beautifully, and the ice cream firms up for that perfect scoopable texture.
For optimal freshness, store your ice cream in an airtight container. This helps prevent ice crystals from forming on the surface, which can occur when air gets in. If you are concerned about the ice cream absorbing other odors from the freezer, place a piece of parchment paper directly on the surface before sealing the container. This simple trick can help maintain the purity of the flavors.
Serving Suggestions
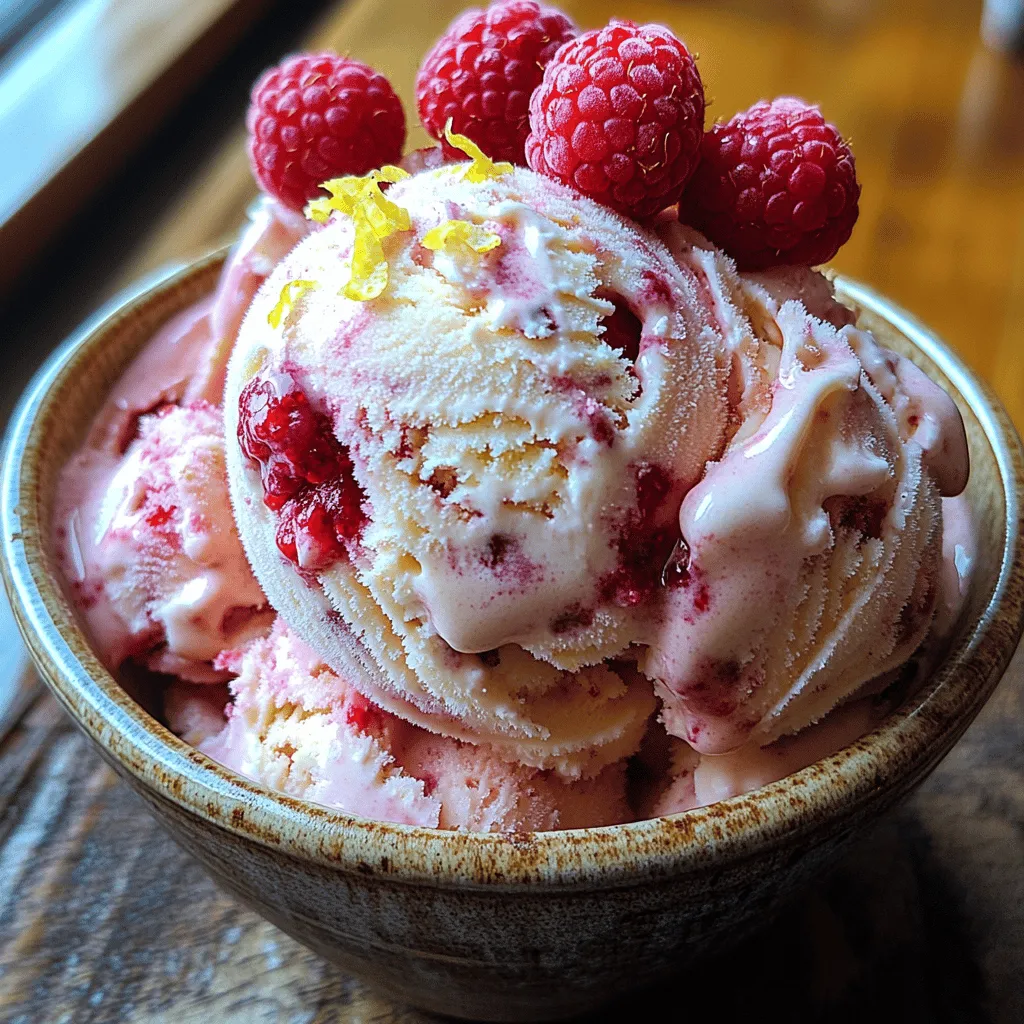
When it comes to serving your Lemon Raspberry Whirl Ice Cream, presentation can elevate the experience significantly. Here are a few creative ideas:
1. Elegant Scoops: Use a warm ice cream scoop to create perfectly round scoops. Serve the ice cream in chilled bowls or waffle cones for a delightful touch.
2. Layered Desserts: For a visually stunning presentation, consider layering the ice cream in glasses with crushed cookies or graham crackers, fresh fruit, or even whipped cream to create a parfait. This adds texture and flavor, making each bite exciting.
3. Complementary Pairings: Lemon Raspberry Whirl Ice Cream pairs wonderfully with a variety of desserts. Consider serving it alongside a slice of lemon pound cake, brownies, or a simple butter tart. For beverages, a refreshing lemonade or herbal iced tea can enhance the overall experience.
4. Garnishes: Elevate your dish with garnishes that add both visual appeal and flavor. Fresh mint leaves, a sprinkle of lemon zest, or a few whole raspberries on top can create an eye-catching dish. Drizzling some extra raspberry sauce around the plate adds a beautiful finishing touch.
Nutritional Information
Understanding the nutritional content of your homemade Lemon Raspberry Whirl Ice Cream can help you enjoy it guilt-free. While the exact values will vary based on the specific ingredients used, here’s a general breakdown per serving (1/2 cup):
– Calories: Approximately 150-200 calories
– Fat: 7-10 grams
– Carbohydrates: 20-25 grams
– Sugar: 10-15 grams
– Protein: 2-3 grams
This homemade ice cream offers a delightful balance of indulgence and nutrition. By using fresh ingredients and controlling the sugar content, you can create a treat that is not only delicious but also relatively wholesome compared to store-bought alternatives. Plus, you can customize sweetness levels, making it suitable for those watching their sugar intake.
Conclusion
Making Lemon Raspberry Whirl Ice Cream at home is not just a culinary project; it’s an experience that brings joy and satisfaction. The process of churning, marbling, and freezing allows you to create a delightful treat that showcases the bright flavors of lemon and the sweet-tartness of raspberries. Each scoop is a reminder of the joys of summer and the pleasures of homemade goodness.
Don’t hesitate to let your creativity shine as you experiment with different flavors and finishes. Whether you share it with family and friends or enjoy it alone, the satisfaction of crafting your own ice cream is unmatched. So gather your ingredients, roll up your sleeves, and embark on this delicious journey. Create, savor, and share the joy of homemade Lemon Raspberry Whirl Ice Cream!
