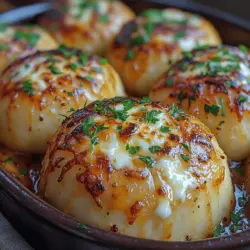
Introduction
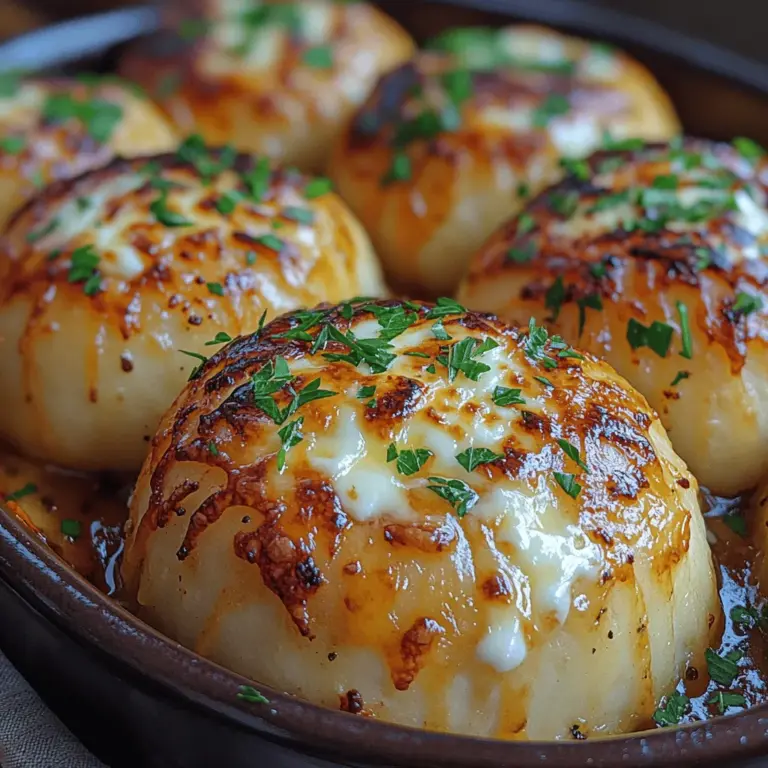
There’s something undeniably special about homemade bread. The warm, inviting aroma that fills your kitchen as it bakes creates an atmosphere of comfort and homeliness. Whether you’re preparing for a family gathering, a cozy dinner with friends, or simply indulging in a delightful snack, bread has a unique way of bringing people together. Among the myriad of bread recipes out there, Cheesy Garlic Bread Rolls stand out as a perfect blend of flavors and textures.
These rolls are not only delicious but also remarkably simple to make, making them accessible for cooks of all skill levels. In this recipe, the comforting taste of garlic melds beautifully with the rich, gooey goodness of cheese, resulting in rolls that are both satisfying and indulgent. Ideal as a side dish for pasta, a complement to soups, or a snack on their own, Cheesy Garlic Bread Rolls are sure to become a favorite in your household.
The Appeal of Cheesy Garlic Bread Rolls
The allure of Cheesy Garlic Bread Rolls lies in the comforting combination of garlic and cheese. Garlic, with its aromatic qualities and rich flavor, is a beloved ingredient in many cuisines worldwide. When paired with the creamy, melt-in-your-mouth texture of cheese, it creates a culinary experience that is hard to resist.
These rolls enhance any meal, providing a delightful contrast to savory dishes. Picture a warm, cheesy roll served alongside a hearty bowl of marinara pasta, or perhaps a cozy soup on a chilly evening. Not only do they serve as an excellent side, but they also shine as a standalone snack, perfect for dipping or simply enjoying on their own. The versatility of these rolls allows them to be served at any occasion, whether it’s a festive gathering, a casual family dinner, or even a late-night treat.
Understanding the Ingredients
To achieve the perfect Cheesy Garlic Bread Rolls, it’s essential to understand the role of each ingredient in the recipe. Here’s a breakdown of the components that make these rolls so special:
– All-Purpose Flour: This is the foundation of the rolls, providing the necessary structure and texture. Its versatility makes it a staple in many bread recipes, allowing the rolls to rise and develop a soft, pillowy texture.
– Active Dry Yeast: A key player in bread-making, active dry yeast is responsible for fermentation. As it ferments, it produces carbon dioxide, which creates air pockets in the dough, resulting in a light and fluffy texture. Proper activation of the yeast is crucial for the success of your bread rolls.
– Sugar: This ingredient plays a twofold role in the recipe. First, it acts as food for the yeast, helping it to activate and ferment. Second, it enhances the overall flavor of the rolls, adding a subtle sweetness that balances the savory elements.
– Salt: Often underestimated, salt is vital in bread-making. It not only balances the flavors in the dough but also strengthens the gluten structure, which is essential for achieving the right texture in your rolls.
– Warm Milk and Water: These liquids are instrumental in hydrating the dough and activating the yeast. The warmth helps to kickstart the fermentation process, leading to the desired rise in your rolls.
– Unsalted Butter: Adding richness and moisture, unsalted butter contributes to the soft texture of the rolls. It also gives the dough a wonderful flavor that enhances the overall taste of the finished product.
– Garlic: The star ingredient that gives these rolls their distinctive flavor. Garlic is not only delicious but also boasts numerous health benefits, including anti-inflammatory properties and enhanced immune function.
– Mozzarella Cheese: This cheese provides that quintessential cheesy goodness. Its meltability and stretch make it a favorite for rolls, ensuring each bite is packed with indulgent flavor.
– Fresh Parsley: Adding a pop of color and freshness, parsley brightens up the rolls and complements the rich flavors of garlic and cheese.
– Olive Oil and Black Pepper: These ingredients elevate the flavor profile of the rolls. Olive oil adds a fruity, rich note, while black pepper introduces a subtle warmth.
– Extra Melted Butter: Brushed on top of the rolls before serving, this ingredient adds a glossy finish and enhances the richness, making them even more irresistible.
Step-by-Step Guide to Making Cheesy Garlic Bread Rolls
Making Cheesy Garlic Bread Rolls is a rewarding experience that can be enjoyed by bakers of all levels. Here’s a detailed step-by-step guide to help you through the process, starting with the crucial task of activating the yeast.
Activating the Yeast
Activating the yeast is a vital first step in the bread-making process. If your yeast isn’t activated properly, your rolls won’t rise, resulting in dense and unappetizing bread. To activate the yeast, follow these steps:
1. Combine Warm Water and Milk: In a small bowl, mix together warm water (ideally between 110°F and 115°F) and warm milk. The warmth is key here; it should feel comfortably warm to the touch but not hot, as excessive heat can kill the yeast.
2. Add Sugar and Yeast: Sprinkle the sugar into the warm liquid mixture, stirring gently until dissolved. Then, add the active dry yeast. Allow this mixture to sit for about 5 to 10 minutes. During this time, you should see the yeast begin to bubble and foam, which indicates that it is alive and ready to work its magic.
3. Check for Activation: After 10 minutes, if the mixture has doubled in size and is frothy, your yeast is successfully activated. If it hasn’t bubbled, it may be a sign that your yeast is old or that the liquid was too hot or cold. In this case, you may need to start over with fresh yeast.
Once your yeast is activated, you can proceed to mix it with the other ingredients to create the dough for your Cheesy Garlic Bread Rolls.
Stay tuned as we continue with detailed instructions on kneading the dough, shaping the rolls, and baking them to golden perfection.
{{image_1}}
Preparing the Dough: Techniques for Achieving a Soft Dough
The foundation of any great bread roll is the dough. When making Cheesy Garlic Bread Rolls, achieving a soft and pliable dough is essential. Start with high-quality bread flour, which has a higher protein content compared to all-purpose flour. This protein is crucial for gluten development, which helps create that desirable chewy texture.
To prepare the dough, combine your warm water, sugar, and yeast in a mixing bowl. Allow it to sit for about 5-10 minutes until it becomes frothy. This step activates the yeast, ensuring your rolls rise beautifully. Once activated, add in your flour, salt, and any other dry ingredients you’re using. Mix until a shaggy dough forms.
If the dough feels too sticky, sprinkle in a little extra flour, but be cautious not to overdo it. The goal is to have a dough that is tacky but manageable. After mixing, let the dough rest for about 10 minutes. This short rest period helps to hydrate the flour and makes it easier to knead.
Kneading: Importance of Developing Gluten for Texture
Kneading is a crucial step in bread-making, as it develops the gluten structure that gives bread its texture. Transfer your dough to a floured surface and begin kneading by pushing it down and away from you, then folding it back over itself. Rotate the dough a quarter turn and repeat. This process should take about 8-10 minutes.
The dough is ready when it becomes smooth, elastic, and springs back when you poke it with your finger. Proper kneading ensures a strong gluten network, which will trap the gases produced by the yeast during fermentation, resulting in a light and airy roll.
Making the Garlic Butter Filling: Tips for Maximizing Flavor
While your dough is rising, it’s time to prepare the garlic butter filling that will elevate your Cheesy Garlic Bread Rolls. Start by melting unsalted butter in a small saucepan over low heat. Once melted, remove it from the heat and stir in minced garlic. For added flavor, consider incorporating fresh herbs such as parsley or basil, and a pinch of salt to taste.
For an extra depth of flavor, you can also add grated Parmesan cheese, which will enhance the overall taste of the rolls. Let the garlic butter mixture cool slightly before using it to ensure it doesn’t prematurely melt the cheese when filling the rolls.
Shaping the Rolls: Techniques for Creating Uniform Rolls
Once your dough has doubled in size during the first rise, it’s time to shape your rolls. Gently punch down the dough to deflate it and turn it out onto a clean, floured surface. Divide the dough into equal portions; for larger rolls, aim for about 12 pieces, and for smaller ones, 16-20 pieces.
To shape each roll, flatten a piece of dough into a small circle, place a spoonful of garlic butter filling in the center, and sprinkle with your choice of cheese. Fold the dough over the filling and pinch the edges to seal. Roll the dough ball gently in your hands to create a smooth surface. This technique not only helps in achieving uniformity but also ensures that the filling is well-contained.
Second Rise: Importance of This Step for Fluffiness
After shaping your rolls, place them seam-side down in a greased baking dish or on a lined baking sheet. Cover them with a clean kitchen towel and allow them to rise again for about 30-45 minutes. This second rise, also known as proofing, is vital for achieving that fluffy texture. During this time, the yeast continues to work, producing carbon dioxide that expands the dough and creates air pockets.
Preheating the Oven: Ensuring Optimal Baking Conditions
While the rolls are undergoing their second rise, preheat your oven to 375°F (190°C). Preheating is crucial for bread baking, as it ensures that the rolls start baking immediately when placed in the oven. This initial burst of heat helps to set the crust and creates a beautiful golden exterior.
Baking: Indicators of Doneness and Achieving the Perfect Golden Brown
Once your rolls have risen and your oven is preheated, it’s time to bake. Carefully place your rolls into the oven and set a timer for 20-25 minutes. The rolls are done when they are golden brown on top and sound hollow when tapped on the bottom. You can also use a thermometer to check the internal temperature, which should be around 190°F (88°C) for perfectly baked bread.
For an extra touch, brush the tops of the rolls with any remaining garlic butter during the last 5 minutes of baking. This will enhance the garlic flavor and give your rolls a shiny, appetizing glaze.
Serving Suggestions: Ideas for Enjoying the Rolls Fresh Out of the Oven
These Cheesy Garlic Bread Rolls are best enjoyed warm right out of the oven. Serve them as a delightful appetizer, alongside pasta dishes, or as a side with soups and salads. For a special touch, consider serving them with marinara sauce or a herbed olive oil for dipping.
To showcase their cheesiness, pull apart a roll to reveal the gooey cheese within. You can also pair these rolls with a fresh garden salad or serve them as a part of a bread basket at your next family gathering. Their versatility makes them a perfect addition to any meal.
The Science Behind Bread Making
Understanding the science behind bread making can deepen your appreciation for the craft. Yeast fermentation is a biochemical process where yeast consumes sugars and produces carbon dioxide and alcohol, causing the dough to rise. This process is vital for developing the flavor and texture of your rolls.
Gluten development is equally important; as you knead the dough, gluten proteins align and strengthen, creating a network that traps gas and provides structure. The temperature also plays a significant role in this process. Warmer conditions accelerate yeast activity, while cooler temperatures slow it down, which is why it’s essential to work with warm water and keep your dough in a warm environment to encourage rising.
Variations and Customizations
One of the joys of making Cheesy Garlic Bread Rolls is the opportunity for customization. You can easily switch up the flavors by adding different cheeses such as mozzarella, cheddar, or even a sharp gouda for a unique twist. For an herby flavor, try incorporating dried oregano, thyme, or rosemary into the filling.
If you’re feeling adventurous, consider adding spices like red pepper flakes or smoked paprika to the garlic butter for a little kick. For a sweet version, you can create cinnamon sugar rolls by replacing the garlic with melted butter, brown sugar, and cinnamon, adding raisins or nuts for texture.
Health Considerations
While these rolls are undeniably indulgent, it’s essential to be mindful of dietary restrictions. For those with gluten intolerance, consider using a gluten-free flour blend to make the dough. Additionally, you can always adjust the portion size to enjoy these delicious treats without overindulging. Pairing them with a fresh salad or vegetable dish can help balance your meal.
The Cultural Significance of Bread
Bread holds a significant place in many cultures around the world. It is often seen as a staple food, symbolizing sustenance and community. Garlic bread, in particular, has roots in Italian cuisine, where it is traditionally served as a side to pasta dishes. However, variations of garlic bread can be found globally, from the French “pain à l’ail” to the Greek “garlic bread” served with olive oil and herbs.
In many cultures, sharing bread is a communal act that fosters connection and togetherness. Baking your own Cheesy Garlic Bread Rolls not only creates a delicious treat but also embodies the spirit of hospitality and warmth.
Conclusion
Baking Cheesy Garlic Bread Rolls at home is a rewarding experience that brings joy and satisfaction. The delightful aroma of freshly baked rolls filled with melty cheese and fragrant garlic fills your kitchen, creating a warm and inviting atmosphere. As you gather around the table to share these rolls with family and friends, you’re not just serving food; you’re creating lasting memories.
Encourage others to experience the joy of baking by sharing this recipe. The process of making these rolls is not just about the end product; it’s about nurturing a passion for cooking and enjoying the fruits of your labor. Homemade meals nourish both the body and soul, and these Cheesy Garlic Bread Rolls are a perfect example of that love in action.


