Introduction
Red velvet cookies have captured the hearts and taste buds of dessert lovers everywhere, merging the classic appeal of red velvet cake with the delightful portability of cookies. These vibrant, chewy treats are not only visually stunning but also boast a unique flavor profile that makes them a favorite for both special occasions and everyday indulgences. The addition of a luscious cream cheese filling elevates these cookies to new heights, providing a rich, tangy contrast to the sweet, velvety exterior.
Whether you are celebrating a holiday, hosting a gathering, or simply treating yourself to something special, cream cheese filled red velvet cookies are a delightful choice that will impress your guests and satisfy your sweet cravings. In this article, we will delve into the history of red velvet desserts, explore the essential ingredients for this recipe, and guide you through the initial steps to creating these delectable cookies.
Understanding Red Velvet Cookies
History and Origins of Red Velvet Desserts
The origins of red velvet cake can be traced back to the early 20th century, with the first known recipe appearing in a baking book published in 1920. This dessert became popular during the 1930s, particularly in the Southern United States, where it was often served at special occasions and celebrations. The cake’s striking red color, combined with its moist texture and subtle chocolate flavor, made it a showstopper at any gathering.
Red velvet desserts are believed to have originated from the use of cocoa powder in the recipe, which, when combined with acidic ingredients like buttermilk and vinegar, creates a chemical reaction that enhances the cocoa’s color. The addition of red food coloring was a later development, amplifying the dessert’s signature hue and making it even more visually appealing. Over time, this dessert has evolved, inspiring various adaptations, including cookies, brownies, and cupcakes.
The Significance of Red Coloring and Cocoa in the Flavor Profile
The eye-catching red color of red velvet cookies is not just for aesthetic appeal; it also plays a role in the overall flavor experience. The unique interaction between cocoa powder and acidic ingredients creates a mild chocolate flavor that is not overpowering but rather complements the sweetness of the cookie. The red hue, often associated with love and passion, adds a festive touch, making these cookies perfect for celebrating occasions like Valentine’s Day, Christmas, or birthdays.
The cream cheese filling takes the flavor profile to another level. Its smooth, tangy taste contrasts beautifully with the sweet, soft cookie, creating a harmonious balance that will leave you craving more. This delightful combination of flavors and textures is what makes cream cheese filled red velvet cookies a must-try dessert.
Comparison with Traditional Red Velvet Cake
While traditional red velvet cake and cookies share the same base ingredients and flavor profile, their textures set them apart. Red velvet cake is known for its light, fluffy layers, often paired with a rich cream cheese frosting that further enhances its decadent nature. In contrast, red velvet cookies are chewy and dense, offering a more portable and convenient way to enjoy the classic flavor.
The addition of cream cheese filling in these cookies mimics the experience of frosting in a cake, providing that familiar tangy sweetness in every bite. This makes cream cheese filled red velvet cookies not only a delicious alternative to the cake but also a creative way to enjoy a beloved dessert in a new form.
Ingredients Breakdown
Understanding the role of each ingredient in your cream cheese filled red velvet cookies is essential to achieving the perfect texture and flavor. Below, we will break down the key components of this delightful recipe:
All-Purpose Flour: Providing Structure
All-purpose flour is the backbone of cookie recipes, providing the necessary structure to hold the cookie shape while allowing it to remain tender. In this recipe, it helps create a chewy texture while balancing the moisture from the wet ingredients. Using the right amount of flour is crucial; too much can lead to dry cookies, while too little can result in cookies that spread too much during baking.
Cocoa Powder: Enhancing Flavor and Color
Cocoa powder is what gives red velvet cookies their subtle chocolate flavor. In combination with the other ingredients, it contributes to the overall taste without overpowering the signature red hue. The quality of cocoa powder can make a significant difference; using high-quality Dutch-processed cocoa can enhance the flavor and richness of your cookies.
Baking Soda and Salt: Leavening Agents and Flavor Balance
Baking soda is a key leavening agent in this recipe, helping the cookies rise and achieve a light texture. It works in tandem with the acidic components of the recipe to create carbon dioxide bubbles, which contribute to the cookie’s fluffy structure. A pinch of salt is also included to balance the sweetness and enhance the overall flavor of the cookies.
Unsalted Butter: Adding Richness and Moisture
Unsalted butter is essential for adding richness and moisture to the cookies. It also contributes to the overall flavor and texture, creating a tender cookie. Using unsalted butter allows you to control the amount of salt in the recipe, ensuring a well-balanced final product. Make sure to use butter at room temperature to achieve a creamy consistency when mixing with sugar.
Granulated and Brown Sugar: Contributing Sweetness and Texture
This recipe calls for both granulated and brown sugar, each playing a distinct role in the cookie’s texture and flavor. Granulated sugar helps the cookies spread, while brown sugar, with its higher moisture content and molasses flavor, contributes to a chewier texture and deeper flavor profile. The combination of these two sugars creates a perfect balance of sweetness in the final cookies.
Eggs: Binding and Moisture
Eggs are crucial in this recipe, serving as a binding agent that holds the cookie ingredients together. They also add moisture and richness to the cookies, helping to create a tender crumb. For the best results, use large eggs at room temperature to ensure they incorporate smoothly into the batter.
Vanilla Extract: Flavor Enhancer
Vanilla extract is a staple ingredient in many baking recipes, and for good reason. It enhances the overall flavor of the cookies, adding a warm, sweet aroma that complements the other ingredients. Using pure vanilla extract will provide the best flavor, although imitation vanilla can work in a pinch.
Red Food Coloring: The Signature Hue
The vibrant red color of these cookies is achieved through the use of red food coloring. This ingredient is what truly sets red velvet desserts apart, giving them their iconic appearance. When selecting food coloring, opt for a high-quality gel or liquid coloring that will provide a rich hue without altering the flavor of the cookies.
Cream Cheese Filling: Description of Texture and Taste
The star of this recipe is the creamy filling made from cream cheese, which adds a delightful tanginess and a luxurious texture. When combined with powdered sugar and vanilla extract, the filling becomes smooth and sweet, creating a beautiful contrast to the soft, chewy cookie exterior. This filling not only enhances the flavor but also creates a stunning visual effect when the cookies are bitten into, revealing a delicious surprise inside.
Optional White Chocolate Chips: Adding Sweetness and a Creamy Texture
While not a necessary component, adding white chocolate chips to the cookie dough can provide an extra layer of sweetness and creaminess. The subtle vanilla flavor of white chocolate pairs beautifully with the red velvet base, making these cookies even more indulgent. Feel free to omit them if you prefer a more traditional red velvet cookie experience.
Step-by-Step Guide to Making Cream Cheese Filled Red Velvet Cookies
Before diving into the baking process, it’s essential to prepare your kitchen for success. This means gathering all your ingredients, tools, and utensils, and ensuring that your workspace is clean and organized. Preheating your oven is also a crucial step; it ensures that your cookies bake evenly and achieve the perfect texture. Set your oven to 350°F (175°C) and allow it to fully preheat while you work on the cookie dough and cream cheese filling.
Preparing Your Kitchen and Preheating the Oven: Importance of Proper Setup
A well-prepared kitchen is key to a successful baking experience. Start by gathering your ingredients, measuring them accurately, and placing them in bowls for easy access. You’ll need mixing bowls, a whisk, a spatula, a baking sheet lined with parchment paper, and an electric mixer (or a whisk for manual mixing).
Once your oven is preheated, you’ll be ready to start mixing your cookie dough. Having everything in place not only streamlines the process but also minimizes the chances of forgetting any ingredients or steps.
Creating the Cream Cheese Filling: Techniques for Achieving the Perfect Texture
The cream cheese filling is what makes these red velvet cookies truly special. To create the perfect filling, start with room-temperature cream cheese, which will blend more smoothly than cold cream cheese. In a mixing bowl, combine the softened cream cheese with powdered sugar and a splash of vanilla extract. Using an electric mixer or a whisk, beat the mixture until it is creamy and smooth, ensuring there are no lumps.
You want the filling to be thick enough to hold its shape when piped into the cookies, but not so thick that it becomes difficult to work with. Taste the filling and adjust the sweetness by adding more powdered sugar if desired. Once your cream cheese filling is ready, set it aside while you prepare the cookie dough.
With your kitchen set up and the cream cheese filling ready, you’re well on your way to creating delicious cream cheese filled red velvet cookies. As we continue with the recipe, we’ll explore how to mix the cookie dough, form the cookies, and bake them to perfection. Stay tuned for the next part, where we will complete the process and share tips for achieving the best results!

Mixing Dry Ingredients: Tips for Ensuring Even Distribution
When preparing your Cream Cheese Filled Red Velvet Cookies, the first step is to mix the dry ingredients thoroughly. This step is crucial because it ensures that the flavors and leavening agents are evenly distributed throughout the cookie dough. Start by sifting together the all-purpose flour, cocoa powder, baking soda, and salt. Sifting not only helps to aerate the flour, creating a lighter texture, but it also allows any clumps to break apart, ensuring a smooth blend.
To enhance even distribution, consider using a whisk to combine the dry ingredients after sifting. Whisking helps to further break down any remaining lumps and ensures that the baking soda and salt are evenly mixed with the flour and cocoa powder. This step is vital for achieving that perfect rise and soft texture in your cookies.
Making the Cookie Dough: Techniques for Incorporating Wet and Dry Ingredients
Once your dry ingredients are well mixed, it’s time to prepare the wet ingredients. In a separate bowl, cream together the softened butter and sugar until the mixture is light and fluffy. This process introduces air into the butter, which contributes to the final texture of the cookies. Add in the eggs and vanilla extract, mixing until fully combined.
Next, gradually add the dry ingredient mixture to the wet ingredients. It’s essential to do this step by step to avoid overworking the dough, which can lead to tough cookies. Start by adding about a third of the dry mixture, gently folding it into the wet ingredients using a rubber spatula or wooden spoon. Continue this process until all the dry ingredients are incorporated, being careful not to overmix. The dough should be soft, slightly sticky, and vibrant red.
Forming the Cookies: Step-by-Step Process for Wrapping Cream Cheese Filling
The star of the show in these cookies is undoubtedly the cream cheese filling. To create it, beat the cream cheese, powdered sugar, and a splash of vanilla extract in a bowl until smooth and creamy. This filling adds a delightful richness that perfectly complements the sweet, tangy flavor of the red velvet cookie.
To form the cookies, start by taking a generous tablespoon of the cookie dough and flattening it in your palm. Place about a teaspoon of the cream cheese filling in the center of the dough. Carefully fold the edges of the dough over the filling, pinching it closed to completely encase the cream cheese. Roll the filled dough into a ball to ensure it holds its shape during baking. Repeat this process until all the dough and filling are used, spacing the cookies about two inches apart on a lined baking sheet.
Baking: Understanding the Importance of Timing and Temperature
With your cookies formed, preheat your oven to 350°F (175°C). Baking at the correct temperature is critical for achieving the desired texture and flavor. The cookies need to bake for approximately 10 to 12 minutes. Keep a close eye on them; they should be set around the edges with a slightly soft center. Overbaking can lead to dry cookies, while underbaking may result in a gooey texture.
For an even bake, rotate the baking sheet halfway through the baking time. This ensures that all cookies receive the same amount of heat, leading to uniformly baked treats. Once baked, allow them to cool on the baking sheet for a few minutes before transferring them to a wire rack to cool completely.
Cooling: The Significance of Letting Cookies Rest Before Serving
Cooling cookies is a vital step in the baking process. Allowing your Cream Cheese Filled Red Velvet Cookies to rest for at least 5-10 minutes on the baking sheet helps them firm up and makes transferring them to a wire rack easier. During this cooling period, the flavors will continue to meld, and the texture will settle, resulting in a deliciously chewy cookie.
Once transferred to the wire rack, let them cool completely before serving. This step not only enhances the flavors but also ensures that the cream cheese filling remains intact and doesn’t ooze out when you take your first bite.
Visual Appeal of Cream Cheese Filled Red Velvet Cookies
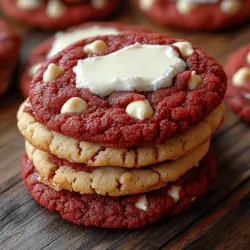
The visual appeal of your Cream Cheese Filled Red Velvet Cookies is just as important as their taste. Presentation in baking plays a significant role in how your treats are received. The rich red color of the cookies contrasted against the white cream cheese filling creates a striking visual that is sure to impress.
For additional garnishing, consider dusting the cooled cookies with a light sprinkle of powdered sugar or drizzling them with white chocolate. These simple touches not only enhance the visual appeal but also add an extra layer of sweetness.
When serving, pair these cookies with a glass of cold milk or a steaming cup of coffee or tea. They are perfect for events such as birthday parties, holiday gatherings, or simply as a delightful afternoon treat.
Nutritional Information
Understanding the nutritional benefits of your ingredients can help you enjoy your Cream Cheese Filled Red Velvet Cookies with mindfulness. Traditional red velvet cookies are rich in flavor but also contain a fair amount of sugar and fat. Each cookie typically contains around 150-200 calories, depending on the size and specific ingredients used.
The cream cheese filling adds a creamy texture but also contributes to the overall caloric content. When indulging in these cookies, moderation is key. They can be a delightful treat when enjoyed as part of a balanced diet, offering a moment of joy and satisfaction.
Variations and Customizations
One of the best aspects of baking is the ability to customize recipes to suit your tastes or dietary needs. For alternative fillings, consider using chocolate ganache for a rich, decadent experience or fruit preserves for a fruity twist. If you’re accommodating dietary restrictions, gluten-free flour can be substituted for all-purpose flour in this recipe, allowing everyone to enjoy the deliciousness of these cookies.
You can also experiment with different flavor options for the cookie base. For instance, a chocolate version can be made by incorporating melted chocolate into the dough, or a vanilla version by omitting the cocoa powder. The possibilities are endless, and each variation brings its unique flavor profile.
Storage and Shelf Life
To maintain the freshness of your Cream Cheese Filled Red Velvet Cookies, proper storage is essential. Place them in an airtight container at room temperature for up to three days. If you want to extend their shelf life, consider freezing them. To freeze, layer the cookies between parchment paper in a freezer-safe container. They can be frozen for up to three months.
To thaw, simply remove the desired number of cookies from the freezer and let them sit at room temperature for about 30 minutes. This way, you can enjoy freshly baked cookies whenever the craving strikes.
When gifting these cookies, presentation matters. Consider placing them in a decorative tin or box, adding a personal touch with ribbon or a handwritten note. This not only enhances the gift but also shows the recipient how much thought you put into it.
Conclusion
Baking is truly a joyful experience, and making Cream Cheese Filled Red Velvet Cookies is no exception. The combination of rich flavors, beautiful presentation, and warm memories shared with loved ones makes this treat special. Don’t hesitate to experiment with the recipe, allowing your creativity to shine through as you make it your own.
Whether you’re baking for a special occasion or just to enjoy a sweet moment at home, these cookies are a delightful way to celebrate the art of baking. Embrace the process, savor the taste, and share the joy of these delicious treats with family and friends.